原版梅林是基于Entware来安装插件的
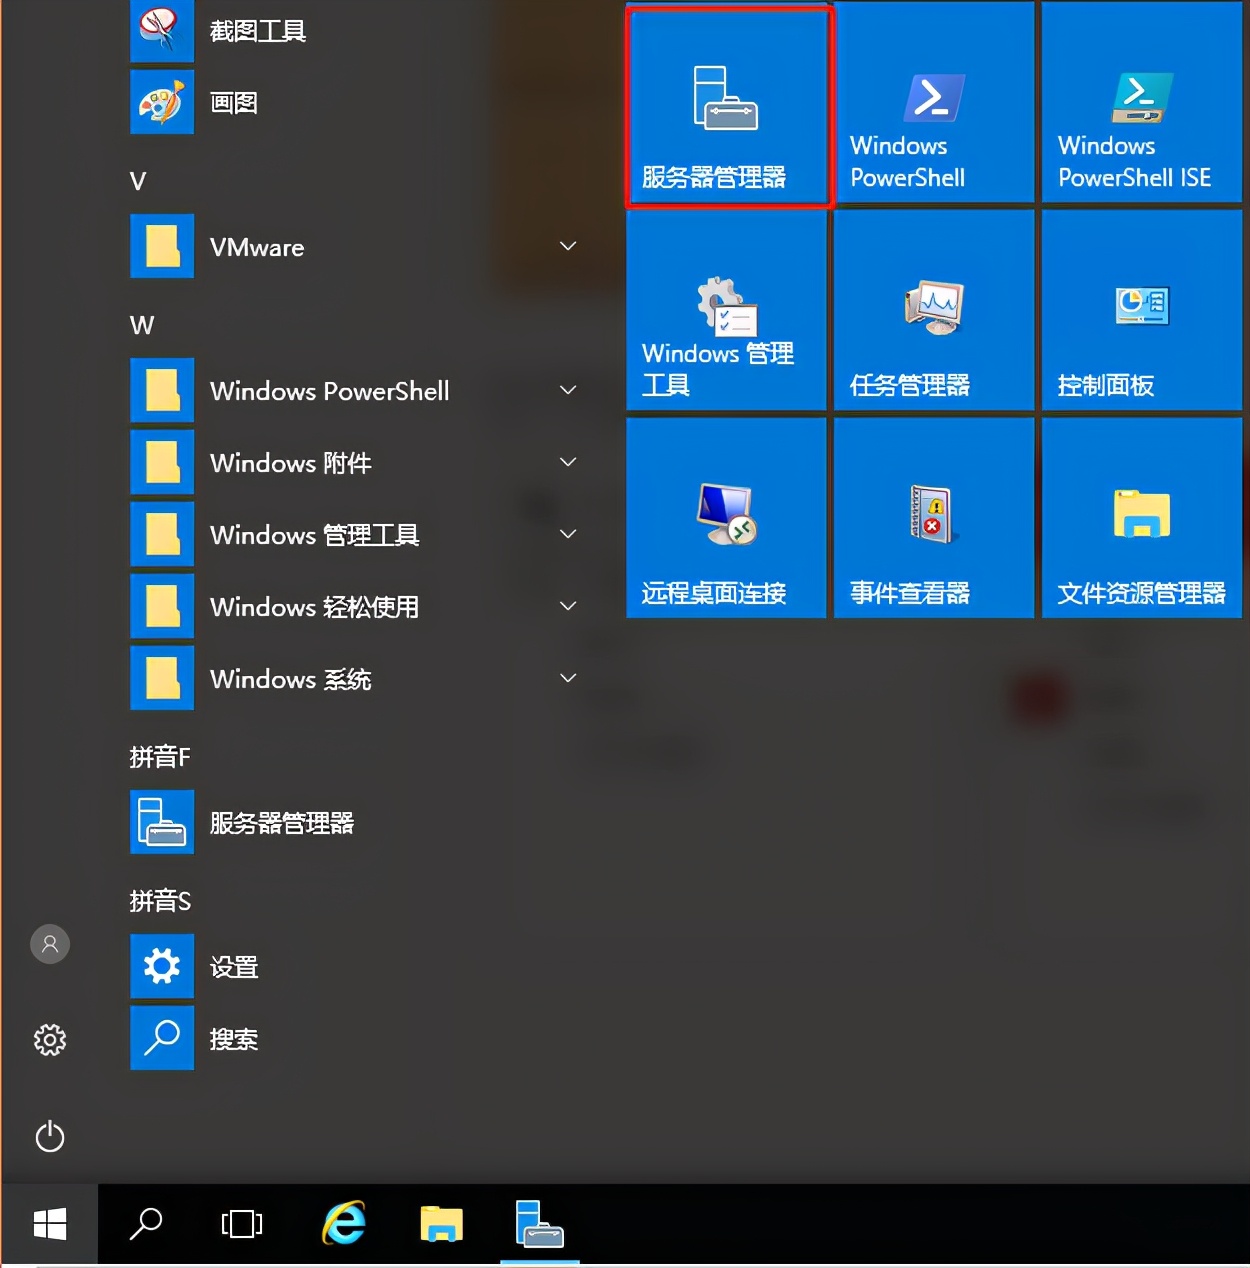
1、首先进入路由器设置界面
2、选择系统管理,然后选择系统设置,修改下面几项为开启。如图所示。
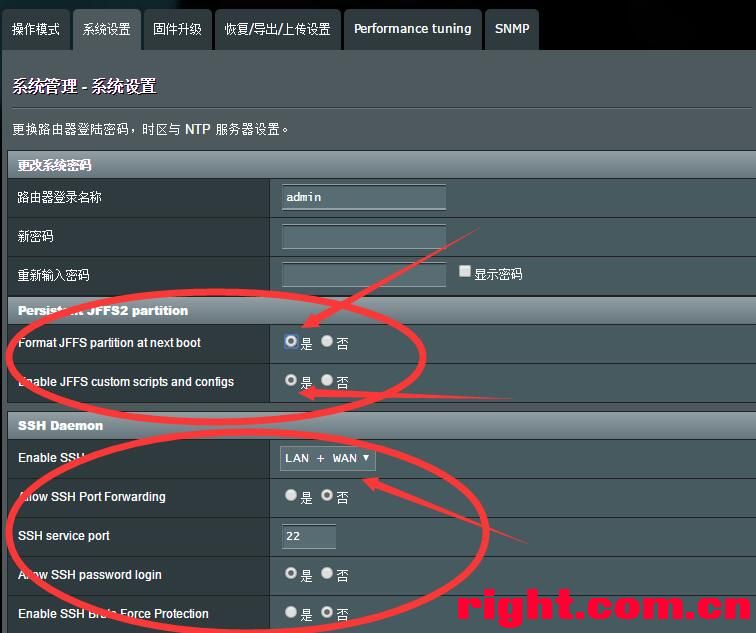
3、点击底部的应用修改,然后等几秒直接重启路由器。
这样路由器就打开SSH和JFFS了。
4、使用putty等SSH管理工具连接192.168.1.1 登录账户admin 密码是你的路由器密码
5、找一个U盘或读卡器 内存卡,我们要把entware安装到里面。
(必须接USB存储设备,不然安装会退出,提示没有可用的存储设备)
注意,U盘或者内存卡必须格式化成Linux格式,推荐EXT4
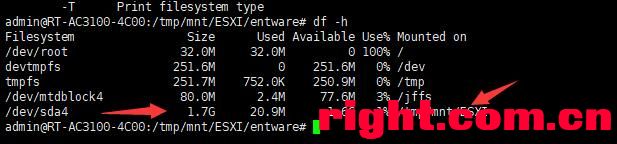
6、插上U盘或读卡器,然后在SSH里输入 df -h 看看有没有U盘
这里可以看到,我的名为ESXI的U盘找到了
7、按照官方的流程,安装entware。先在SSH里执行命令 entware-setup.sh 回车
然后会让你选择安装到的分区,因为就一个U盘,直接选择U盘,然后等待安装即可。
安装完成后会在U盘创建entware相关的文件,你就可以安装使用entware插件了
请注意,您不能同时使用Optware和Entware。
重要提示:华硕的DownloadMaster基于Optware,因此与Entware不兼容。您必须卸载DownloadMaster并查看Entware提供的替代方案。
卸载后,应确保删除已装入磁盘分区上的“asusware.arm”或“asusware。*”目录。否则,Entware将无法正常工作。
安装和配置过程必须通过telnet或SSH完成。如果那部分让你害怕,那么就忘记了Entware:必须通过telnet / SSH安装和配置所有东西。
只需键入终端:
entware-setup.sh
admin@RT-AC66U:/tmp/mnt/sda1/asusware# entware-setup.sh
 Info:  This script will guide you through the Entware installation.
 Info:  Script modifies only "entware" folder on the chosen drive,
 Info:  no other data will be touched. Existing installation will be
 Info:  replaced with this one. Also some start scripts will be installed,
 Info:  the old ones will be saved to .entwarejffs_scripts_backup.tgz

 Info:  Looking for available partitions...
[1] --> /tmp/mnt/sda1
 =>  Please enter partition number or 0 to exit
选择应安装Entware的分区,在这种情况下只有[1] – > / tmp / mnt / sda1
[0-1]: 1
 Info:  /tmp/mnt/sda1 selected.

 Info:  Creating /tmp/mnt/sda1/entware folder...
 * Warning:  Deleting old /tmp/opt symlink...
 Info:  Creating /tmp/opt symlink...
 Info:  Creating /jffs scripts backup...
tar: removing leading \\'/\\' from member names
 Info:  Modifying start scripts...
 Info:  Starting Entware deployment....

Info: Creating folders...
Info: Deploying opkg package manager...
Downloading /opt/bin/opkg... success!
Downloading /opt/etc/opkg.conf... success!
Downloading /opt/etc/profile... success!
Downloading /opt/etc/init.d/rc.func... success!
Downloading /opt/etc/init.d/rc.unslung... success!
Info: Basic packages installation...
Downloading http://pkg.entware.net/binaries/mipsel/Packages.gz.
Updated list of available packages in /opt/var/opkg-lists/entware-ng.
Installing ldconfig (1.0.12-1) to root...
Downloading http://pkg.entware.net/binaries/mipsel/ldconfig_1.0.12-1_mipselsf.ipk.
Installing findutils (4.5.14-1) to root...
Downloading http://pkg.entware.net/binaries/mipsel/findutils_4.5.14-1_mipselsf.ipk.
Installing libc (1.0.12-1) to root...
Downloading http://pkg.entware.net/binaries/mipsel/libc_1.0.12-1_mipselsf.ipk.
Installing libgcc (4.8.5-1) to root...
Downloading http://pkg.entware.net/binaries/mipsel/libgcc_4.8.5-1_mipselsf.ipk.
Installing libssp (4.8.5-1) to root...
Downloading http://pkg.entware.net/binaries/mipsel/libssp_4.8.5-1_mipselsf.ipk.
Configuring ldconfig.
Configuring libgcc.
Configuring libc.
Configuring libssp.
Configuring findutils.

Congratulations! If there are no errors above then Entware-ng is successfully initialized.

Found a Bug? Please report at https://github.com/Entware-ng/Entware-ng/issues

Type \\'opkg install \\' to install necessary package.
该脚本将创建一个名为“entware”的新目录,而不是像“旧”方式那样创建“asusware”,但结果是相同的:
重启后有问题的请参照 https://hqt.ro/how-to-install-new-generation-entware/ 这个地址
admin@RT-AC66U:/tmp/home/root/# cd /opt
admin@RT-AC66U:/tmp/mnt/sda1/entware# 允许随意转载;但,请点赞!点赞-NMBHOST:NMB HOST » 梅林固件打开JFFS分区安装Entware来安装软件
 DELL R720服务器不开机修复记录 (转)